Showing posts with label cement. Show all posts

Tuesday, June 30, 2015

I can't afford lime render!

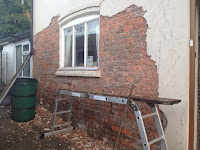
Lime rendering done by Welsh Lime Works in Cardiff
Lime rendering is a specialist trade (not to be confused with lime plastering or cement rendering!) and as such it takes time served craftspeople to do it well and it also takes more time to do. These two factors mean that many people who need to have their houses re-rendered choose the cement route. Using cement, of course, represents a higher long term cost. The render will crack and, most likely, damp will be re-introduced to the walls. This will need to be addressed again in the future, whilst a lime render should last the lifetime of the building.

A customer of ours choose cement render over lime due to the cost, however within 8 months the cement had failed, the wall was still wet and she has had to do it again. So the difference in price has already been negated due to failure.

However, this article is about what to do if you cannot afford at the moment to replace the cement with lime.

My recommendations (in general) would be as follows:
  • Keep the existing cement render on
  • Regularly check the walls for failed render (tapping the walls will audibly indicate where the render has become separated from the wall)
  • Repair any cracks (even the small ones, especially if facing the prevailing winds and rain) and any blown areas of render
  • When replacing blown areas, it is better to cut around the render to be removed so that the process of removal does not dislodge any of the surrounding render
  • Use cement render to replace / repair
  • Check for failure of seals around doors, windows, pipes etc and repair as necessary
  • Save up and when you can afford it, replace the cement with lime.
Enlarging cracks allows for a better repair as the new render will fit into it
The rationale behind this recommendation is that where you have a structure that has been altered to try to keep water out then as long as this philosophy is being maintained then it will have a better chance of working than when it is not. Cement render and masonry paint is designed to keep water out and as long as it is doing this then it will provide some protection from wind driven rain, however it needs to be uncompromised. So maintenance of its integrity is really important. The more water that gets behind it, the worse the wall will perform and the more likely damp issues become.

This patching and maintaining is really important to allow the wall to perform as well as it can before the ultimate solution of the lime render is applied. So don't waste your money on putting a new coat of cement render over your pre 1919 solid wall house, repair what you have and save your money up so that you don't waste it on an unsustainable, and still quite expensive, piece of cement based sticking plaster!

If you have a 'rising damp' problem (this is rare to occur in most untreated houses, but can be caused by the introduction of cement based renders and plasters onto a breathable wall) then another cheaper option is to remove the cement render up to around 1m above ground level. This wall might then need to be repaired using lime mortar (re-pointing) or it could be lime rendered. Doing this at ground level means that there is no need for scaffolding and the area involved is much less, thus keeping the costs down. You will need a good drip above this so that any water running down the upper wall is not fed directly into the lime or onto the exposed wall.

If you need to put up expensive scaffolding to do the repairs then this brings an extra dimension as the lime rendering becomes more cost effective in the longer term. So any initial repairs to the cement are best done off of a tower scaffold or ladders.

I have written at length before about lime rendering, but it is worth re-iterating at this point the things to remember when looking for a good lime renderer.
  • Use a company that both supplies and installs the render (this can get over the issue of where, if there is a problem with the final work, you are not inbetween a rock and a hard place where the installer blames the manufacturer and the manufacturer blames the installer!)
  • Remember that rendering is not the same as plastering. So use an experienced renderer.
  • Ask for references and a good portfolio of completed works
  • If it is new company then you will need to ask about the experience of the tradespeople and where they served their time. You can then investigate this company.
  • Read up about lime from trusted sources like CADW, Historic England, Historic Scotland etc (depending on where you are)
  • Ask about the mix that they will use and the finish that will be applied. I am a believer in aggregate being really important. I think that the aggregate needs to be a mix of sizes and also that it contains a high proportion of permeable stone.
  • The finish needs to be appropriate. So a lime putty and permeable stone mix can be easily covered with a lime wash, a less breathable combination of NHL lime and sand will probably work better with a mineral paint.

Thursday, February 19, 2015

Cement render on solid walls

Courtesy of http://stonecottagerenovation.blogspot.co.uk/
The majority of old solid stone and brick houses are covered in a liberal amount of cement render these days. I will assume that you know my opinion on cement render on solid walls, so I won't have my normal rant. Ranting about it does not solve the problem - just makes me feel a bit better. I had to live with cement render for many years before I had the opportunity to get it removed and a proper lime render re-instated. Many people who live in old houses do not have the resources needed to undertake this fairly major task. So what to do?

The theory behind using cement render was that by having a water proof finish on the wall it would keep the wall dry. Of course the issues of ground water, cracks, building movement and faults compromises this and so it does get wet and hence then retains the water in the structure. But if you cannot afford the time and expense of replacement you need to address the issue of maintenance.

Maintenance is the often overlooked factor of owning a house. We tend to think in terms of rent vs mortgage rather than the reality of rent vs mortgage AND maintenance (let alone improvement!). Maintenance is key to the success of any home. If you repair all cracks when they appear, ensure that gutters are clear at least once a year etc then you can avoid many of the potential pit falls of having an inappropriate finish on your home. Of course these are all temporary fixes, as it is like putting a plaster on a perpetual wound, but it is better than just leaving the wound to get infected.

So if you have got cement render on your walls try and make a habit of the following checks:

1. Guttering - ensure that there are no leaks and that all the water is draining away freely
2. Cracked render - ensure that all cracks are gauged out and repaired
3. 'Blown render' - tap the render to see if there are any areas where it 'rings hollow'. These areas should be removed and replaced with new render
4. Silicon seals around doors and windows - silicon fails over time and it is a common area where water gets behind the render. So check for failure and replace where needed
5. Compare the outside ground level with the internal floor level. Make sure that any work does not create a situation where the floor level is less than 150mm above the ground level

So all is not lost if you do have cement render on your old house, it is just that you will have greater costs associated with maintenance, so remember to factor this into any budgeting.

Monday, January 26, 2015

Cavities not immune from damp

Cavity walls were designed to keep damp out of homes
Cavity walls have been the standard way of building for the past century. They are designed to have two walls (bound together by wall ties) with one acting as the external face that can get a little wet and the inner one that is protected by the cavity from this potential moisture ingress.

The cavities were vented to allow air to circulate in them to help dry out any moisture that did make it through to the cavity.

All sounds grand.

However, the system has some issues with it on a number of levels.

1. Initial Build - many cavities were not well formed as cement mortar etc would fall down the cavity during the construction period. This can cause a bridge to be formed across the cavity from the outer wall to the inner.

2. Maintenance - the wall ties that were used to bind the two walls together were mild steel and this rusts. So slowly the failure of the ties can cause cracks to appear in the walls and this requires the home owner to replace the ties when needed. Cracks in render also tend to go un-repaired and re-pointing is not undertaken when needed. These issues mean that water gets trapped in the outer wall, thus making the chances of water ingress across the structure more likely.

3. Improvements - many cavities have been insulated over the past couple of decades. This fills the cavity with material that can cause a bridge to form between the two walls. Some materials that have been used in the past have also failed (mostly foams) and these have slumped to the bottom of the cavity in a bit of a mess. It should also be noted that many houses are not fully filled - companies do not like filling around doors, windows, pipes etc as their products can escape through cracks etc and they don't want the hassle of tidying up, so many cavity walls are not very well insulated.

I have come across a number of houses recently where the wall ties and the use of cement renders has caused damp to find its way into what should be a damp free house. Basically what has happened is that the cracks associated with ties and lack of regular maintenance have let water into the outer wall and trapped it there. On mainly westward facing walls this moisture has then either tracked across ties, through or across the top of the insulation, thus reaching the inner wall. The lack of ventilation in the cavity means that the inner wall then gets wet and stays wet (only drying to the internal space).

So just be aware that cavity walls can be damp and that the fundamental remedies to problem might involve:

Re-rendering or at least repairing the 'blown' render
Re-pointing where required
Removal of old cavity wall insulation and potential insulation replacement once outer wall has been repaired
Replacement wall ties (with new stainless steel ties)

So if you are looking to buy a house make sure that you test all the walls (including upper stories) for damp.

There are of course other issues like insulation at wall plate levels, tying in ceiling and wall insulation etc.

Please remember that we can provide an independent damp report for you that will highlight areas of damp, their root cause and appropriate remedies rather than the standard tick box approach that is taken by the more mainstream industry.

Friday, October 3, 2014

The strength of cement


Look no hands! Nine bricks being supported by their edges by a 10mm thick piece of cement render.

I was planning on capping the wall that abuts into my house (this was to reduce the amount of water that is being channeled into the main house from the wall's poor structure). So I started to rake out the pointing where there was a loose brick. One of course lead to another and before I knew it I had taken down four courses of bricks and it didn't stop there.

The neighbours side had a lovely big ivy growing out of it (unknown to me) and this had blown the render on their side and so I had to remove this (a quick yank on the ivy sufficed!) The missing render can be seen on the left hand edge of the picture. The rest of their render was basically intact and so I left it.

I returned to my side and continued to identify the loose bricks. As it turned out this was a further twelve - all the roots from the various plants that were growing out of the wall had destroyed the mortar between the bricks. As I removed the bricks one by one I was amazed as the top two rows of bricks didn't move at all. As you can see from the picture this meant that the two courses ended up being suspended in mid air just by the cement render on their sides. Needless to say I then had to quickly replace the bricks (this time using a lime mortar) to ensure that it all stayed there.

The great thing of course with the old mortar was that it had left the bricks intact and it was easy to dust them off and re-use them. So I have rebuilt the wall and am now awaiting the caps to ensure that the wall stays a lot drier than it has been for the past couple of decades. More on this with the next post!

Monday, September 29, 2014

Lime render and doors

Replacement doors tend to be held in place by screws, not inbuilt frames
The door on my house has seen a lot of changes. Since I have owned it we have had 2 doors. The removal of the render showed that the original door and frame must have been at least 10cm wider (there is a pillar of bricks on the far side in this photo).

When we changed the door we fitted a new frame as well. However, this frame is held in place using screws set into rawl plugs in the wall. This gives a firm enough finish, but it does move when slammed, so what to do with the new lime render, will this get affected by repeated use?

Well the thought is that yes the door will effect the render. As the door vibrates the render can be weakened and a really hard slam could shift and crack the new finish. So the plan is to counter this by using a cement and mesh to really tie the frame into the wall. With a firm and secure frame in place the covering render will be protected from any movement.

Purists might be up in arms about this as it is not lime (well cement is a lime, just a particularly hard and strong type), however this is about being sustainable and I feel that having something that will last longer in a potentially susceptible zone is better than having a purer version fail. The other important element to remember here is that the cement will be covered with the lime putty render, so this will be effectively buried into the wall and the lime will keep it dry.

Friday, September 26, 2014

Brick detailing ruined by cement

Lovely brick arch revealed on front of house
If it weren't for the addition of cement render over the years I think that this detail would have been recoverable, however the cement has pulled off the surface of the bricks and also caused them to break over time.

This detail would have been nice to re-instate on an otherwise bland looking terrace house, but without replacing all of the bricks it is just not possible.

The use of inappropriate materials therefore has an aesthetic effect on older properties as well as the fundamental damage that they cause by changing the way in which they work.

The damage is caused by the cement being too hard and strong. Basically the mortar and / or render should be weaker than the underpinning structure. Having a harder material means that it is the structure that is damaged when the outer coating is removed. Mortars should just be there to keep the main structural blocks apart and the render is there as their protective external wearing layer. Instead cement changes this to a system where the render is the dominant player and the main structure becomes it servant. Surely we can see that this is fundamentally wrong.

Anyway, my wall will just be a plain render finish (as planned), but seeing that lovely level of detail that was in the original house just illustrates to me what has been lost through the use of modern building materials on an old property. Shame.

Friday, September 19, 2014

Cement render = Rotten wood

Removing render exposes timber issues under cracks
One of the other issues that the removal of the cement render exposed was the condition of the wood in the structure.

Admittedly the house has a strange array of wood that has appeared in the most unusual places - joists that go all the way through the house from external surface to external surface. The trouble is that this change in underlying surface meant that the cement render was more likely to crack here. Of course, being cement, it did and this in turn allowed water to get behind the render. This concentration in damp behind the cement of course then fed into the wood.

This is one of the big concerns with cement rendering old houses as it it not obvious until it eventually gives way. One of the many problems that we are storing up for the future generations, by not understanding older properties well enough.

So, if you do have a solid walled house make sure that you maintain any render really well - remove cracks when they form etc. If you do get around to needing to re-render, then do so using a lime based render but also expect to un-earth a range of problems.

I feel that this is a similar situation to the climate change arguments. It is out of sight and so out of mind. It is also largely controlled by large companies with vested interests and so they will not lead the way for change as their industry is profitable as it stands, so why rock the boat, even if you know what you are supplying is ruining the environment (the built one that is rather than the natural one).

Thursday, August 7, 2014

Lime rendering my home

Money where mouth is moment!

I have long been an advocate of treating old solid walls correctly. This means allowing them to breathe using a lime based render (where render is needed of course).

Anyway my house has been suffering from damp for a while and so eventually we have managed to get enough money together to start to put it all right. So we are taking the correct approach of getting the outside done first before moving inwards. So, first part has been to remove all the old cement render from the solid walled parts of the building. Note that we are not taking off the render on the already lime renders timber frame walls, or the newer block cavity walls, that form the end extension on the property.

Front of house is stone, behind door is solid brick wall, next extension is early cavity, still rendered is block cavity at ground level and timber frame above

Front door separates different materials

First floor timber joist exposed. Southern side of building is suffering from rot due to trapped moisture from cement render
I have long been a follower of Harry Cursham at Traditional Technologies (http://www.tradtech.net/) and Welsh Lime Works (http://welshlimeworks.com/) and so I have been very specific about the type of render that will be used. I have chosen the following:

1:3 Mix of Lime Putty (from Limestone NOT Chalk) and Aggregate (and this is one of the keys!)

As you may have read in some of my earlier posts, I see aggregates as being the vital, but often overlooked, element to renders. The aggregate mix that I have chosen is:

1:1 Limestone (3mm to dust) with Sand (50:50 mix of coarse and fine)

The key ingredients are the limestone dust and the limestone putty with the sand acting as a filler. The limestone and lime will do all the work in the render as it is these two elements that will carry the water in and out of the wall. Getting consistency of material, avoiding weak points and ensuring that de-lamination is avoided mean attention to detail!

Tuesday, June 10, 2014

Concrete floors - hate them!

Typical suggestion for a replacement concrete floor

My house is a very typical Victorian Welsh terrace. Solid walls made from a mix of local and imported stone, bricks around the windows, doors and chimney etc. It has also had the typical 'improvements' over time:

Replacement windows
Replacement stairs
Replacement tiles
Toilet moved inside
Rendered with a water proof concrete
Chimneys blocked and replaced with gas boiler and radiators 
etc etc

One of major changes was the replacement of the old suspended floor with a new concrete one. This is proving to be a real pain.

What happens when people replace a suspended floor is that they line the new floor with a Damp Proof Membrane (DPM) underneath and fold it up around the edges of each room. This is meant to tie in with a damp proof course (DPC) in the walls. Unfortunately this is a real weak point as injected DPCs are not very reliable (due to poor installation and not really being the ideal solution in the first place - but it is quick and cheap!) So what happens is that the damp (that was under the floor and previously being wicked away by a healthy draught under the floor boards) now has to find another way out. It does this be focusing on the internal (and external walls) through the foundations of the building. It is carried up by capillary action into the walls (this should be stopped in theory by the DPC, but often is not). If the old plaster was left there then it would travel through this and out into the internal environment (this is why internal ventilation in an old building is really important), however what happens is that the old plaster is removed and replaced with a water proof plaster. This effectively seals any water into the wall and hides it from view. Hooray!?!?

In my house what has happened is that this water has appeared above the new plaster and also crossed through it - water is a persistent beast. So it is my internal walls that are now giving me hassle. The external ones I have largely dealt with by removing the cement render and also creating a drainage channel around the house, but the internal ones!! I recently did a quick damp meter check on the walls and where the external walls are now giving me a figure of 7 - 10% damp but I am getting 30% on the internals. Needless to say the dehumidifier is running on our free PV electric during the day now to try and dry the walls out during the summer months. I will have to re-inject as well to try to slow the next batch of damp that will no doubt be keen to get into the walls. I might even bite the bullet and get a physical DPC installed. The dust, the dust!!

So as a word of advice don't install a concrete floor in an old house, refurbish the old suspended floor, insulate it, ensure that the vents are clear and working etc as it will save you a lot of headaches in the future. If you are really keen on removing the wooden floor then look at using a limecrete floor solution, anything but DPMs, DPCs and concrete!

Tuesday, January 28, 2014

Damp appearing?


In this sort of weather you might find damp in places that were dry before. Why?

Well, when you have driving rain rather than just rain it tends to get into cracks and holes that it might otherwise miss. Key areas that are at risk are:

1. Silicone seals around doors and windows - the sealant fails over time and comes away from the wall or frame, this then allows water to get driven in behind. When the wall gets wet it transmits heat better and so it gets colder. The cold patch then attracts condensation, this then leads to mould formation etc. Builders and DIY'ers are quite notorious for choosing the cheapest / most obvious option. These silicons are the most likely to fail, because basically they are rubbish. Look for a more elastic silicon and one that will adhere for longer. They will all eventually fail, but putting more time between replacement is just easier.

2. Poor pointing - pointing is really important for keeping out driving rain. It can fail in a number of ways. Firstly it can be re-pointed using the wrong mortar. Using cement on old solid walls is fundamentally wrong. It traps water in and also ruins the softer brick / stone. Always use a lime mortar (preferably lime putty with stone dust). Rake out to a depth that is double the height, get it wet first and then press the mortar well into the joints. Pointing should be flush with the bricks / stone.

3. Cracks in render - in a similar vein to the pointing, render on older buildings should be lime based not cement. Again wind driven rain gets into the thinnest cracks and gets stuck behind the cement render. Ideally any cement render should be removed, but at the very least cracks should be repaired to stop the water ingress.

4. Leaky gutters - I see no end of leaky gutters at this time of the year. This is because we use poor quality, narrow plastic guttering, downpipes and fixings. The ideal is to use the correctly sized metal guttering (like Lindab), but at the very least make sure that your guttering is not leaking and draining correctly. Water flowing over walls and behind fascias is asking for trouble.

The main message is MAINTENANCE. Whatever you have on your house just make sure that it is working as well as it can. Then, if possible, look for more permanent solutions in the Spring / Summer when the rain stops!!!!! Lime, especially is easier to apply when it is drier and warmer, so good lime contractors are at a premium during this time, so get in quick.

Wednesday, August 21, 2013

Rotting wooden beam

Not my rot, but it looks quite similar!
Whilst the family are away on holidays I have been practising what I preach. Sleeves have been rolled up and the 1890's Cardiff end terrace is getting a bit of a once over. I will tell you a couple of tales of the coming weeks about my experiences - there are a few already!!

I will start with the unexpected one.

The house has a history and part of that was a council funded make-over in the seventies. Cheap stairs, poor re-wiring, removal of original features, concrete floors, 'damp-proofing' and a new cement render. Arrggghhhhhhh!!!

This particular post is about the joy I found when I took off the cement render on the side of the house to fix a crack in the render. Only a tiny one, but I know the issues associated with this type of fault. I cut out the render using my new angle grinder and knocked off the render, to find that the original house has a 8 by 2 beam / lintel running through the house, right up to the render finish.

The crack in the render had, of course, been allowing water in behind the render and keeping it there. This of course was then fed right into the end grain of the timber. Guess what?? Yes, a lovely rotten beam. So my little repair job has turned into a major disaster! But thankfully I know that there is a problem. Better to find out now rather than when the upper internal wall collapsed! Actually that is over dramatic as the beam is thankfully supported by some 4 by 2 uprights internally. However, this is a happy coincidence rather than good planning! If we didn't have a stud internal wall at that point (and this would be quite feasible) then the whole of the back of the house would be at very high risk of sudden failure. Not a pleasant thought.

So I have treated the wood and will be repairing it so that it should last another 120 years. However it is a clear example of how cement render can seriously affect a house structurally.

The only positive is that it is reassuring that my belief that using the right materials is really, really important when working on old properties. If the wall had been treated with a lime render then the dampness would have been kept away from the end of the beam more. I cannot blame modern materials completely, as the beam should not have been pushed all the way through the wall in the first place - 19th Century builders can be as bad as 20th and 21st century ones! However, the use of modern cement has certainly contributed to its demise.

The treated wood will now be encaptulated in a lime based render to help keep it dry and hopefully now rot free.

To come:
Render removal and French drain installation
Flat roof issues
Oak posts set in the garden